Ever noticed how some portraits just seem to click? It could be the magical touch of the Rule of 3 at work. This simple yet powerful concept can transform the way you plan your compositions, making them more eye-catching and cohesive.
So, what’s the deal with the Rule of 3? Imagine dividing your canvas into thirds, both horizontally and vertically, so it looks like a tic-tac-toe board. Now, you've got four sweet spots where the lines intersect, and placing your main subjects—or focal points—at these spots creates a natural sense of harmony and balance.
Sounds easy, right? But here's the kicker: knowing where to place your elements can dramatically change how a portrait feels. It's the reason why certain portraits grab your attention and make you feel something visceral. Next time, when you're setting up for a portrait, remember this rule. It’s like having a secret weapon in your toolkit.
Defining the Rule of 3
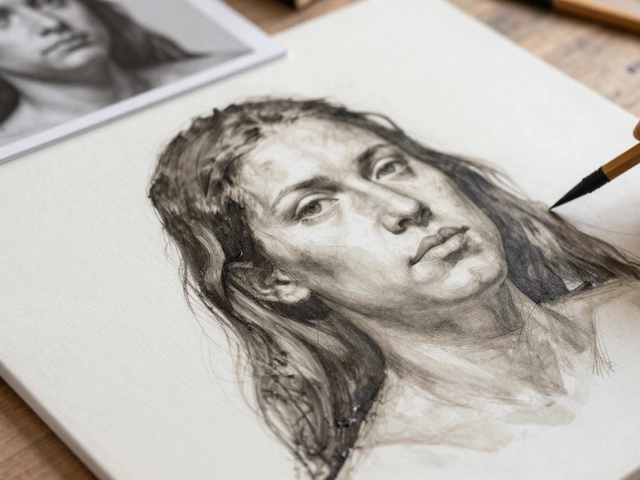
The Rule of 3 is pretty much the bread and butter in portrait painting, and not just for decoration. It's a classic technique that artists use to nail down composition and make the piece more visually appealing. By splitting the canvas into thirds, both horizontally and vertically, you end up with a grid that’s super handy for positioning elements.
Okay, think about your canvas. You’re drawing two evenly spaced lines across and two downwards. This creates nine equally sized rectangles, with four intersections. The magic happens at these intersecting points. Studies actually show that placing main features—like the eyes or the focal part of a subject—at these points draws the viewer's attention naturally. It’s like an automatic shortcut to getting your audience to notice what you want them to see.
Why Thirds?
Ever wonder why it's 'thirds' and not halves or quarters? Turns out, our brains just love things that aren’t perfectly symmetrical. A painting split down the middle can feel a bit static or boring. But, by using the Rule of 3, you’re introducing a slight asymmetry that’s surprisingly satisfying to look at. It's like the composition’s got a rhythm, kind of like music does, which keeps the eye moving across the artwork.
Beyond the Grid
Don't get too stuck on the lines or feel like you have to hit those intersections every time. The idea here is really about guiding you to create balance and focus without getting bogged down by rigid frameworks. You can explore with it! Maybe you want to place a bit of the face off-center to add mystery or intrigue. The Rule of 3 gives you a baseline to do just that but with purpose.
If you're skeptical, try comparing two portraits—the one where elements are centered versus another using the Rule of 3. Odds are, you’ll find yourself more attracted to the latter.
Why the Rule Works
The Rule of 3 isn't just art-world folklore; it’s a trusted tool rooted in human psychology and timeless design principles. At its core, it leverages the natural way our brains process images. You see, when something is divided into thirds, it creates a composition that's not only visually appealing but also easy for us to understand and enjoy.
Our eyes are naturally drawn to intersections, and when artists place key elements at these points, it guides our gaze across the artwork. This creates a story, inviting viewers to engage fully with the painting, not just glance at it.
The Power of Balance
Another reason this rule clicks is all about balance. When too much is happening in one part of a painting, it feels heavy and unbalanced. The Rule of 3 helps distribute elements in a way that feels just right. Imagine a seesaw—for it to balance, weight needs to be managed on both sides. Similarly, using this rule balances the artistic weight.
Leading the Viewer’s Eye
If you've ever looked at a painting and followed its movement with your eyes, that's no accident. The Rule of 3 is crafted to lead the viewer’s eye, creating a path they can follow. By placing points of interest along these imaginary lines, you subtly control how others experience your work.
This technique has been used by famous painters for centuries, from Leonardo da Vinci to modern-day creatives. They all get the secret—this simple approach keeps viewers engaged, coaxing them into a portrait’s depths rather than skimming its surface. So next time you catch yourself captivated by a canvas, remember there’s a good chance the Rule of 3 is doing its job behind the scenes.

Practical Application
Alright, let's break down how you can make the Rule of 3 your new best friend in portrait painting. It’s more than just a nifty guideline; it’s a way to guide the viewer’s eye and tell a story through your work.
Step-by-Step Setup
Here’s a quick way to get started:
- Set Up Your Grid: Using a pencil, lightly sketch two vertical and two horizontal lines, dividing your canvas into nine equally sized parts. You can also use string or tape for more precision.
- Position Your Subject: Place the key elements of your portrait—usually the eyes or face—near one of the four intersections of the grid. This positioning draws the viewer directly to your subject.
- Balance Your Composition: Evenly distribute other elements, like the background or secondary subjects, to avoid one side of the canvas feeling heavier than the other. Balancing elements keeps the art from appearing lopsided.
Tips for Mastery
- Experiment: Don't feel locked into the grid. Rotate or scale your canvas in drafts to see different compositions.
- Color Contrast: Incorporate color theory within the grid; contrasting colors placed at intersecting points can lead to striking results.
- Use Technology: Digital tools can help adjust your grid quickly if you're working with digital portrait painting.
Remember, becoming familiar with the Rule of 3 doesn’t mean you have to stick to it rigidly. Many masters understood it so well they played with it creatively. So as you practice, watch how it affects the balance and feel of your paintings. In time, the technique will become second nature.
Tricks from the Pros
Ever wondered how some artists seem to nail their portraits every time? They’ve got a few tricks up their sleeves, and here’s the scoop.
Pushing Boundaries with the Rule of 3
First up, while the Rule of 3 may sound rigid, pros know when to bend it. They often use it as a guideline rather than a hard rule. Playing around with positioning can create interesting dynamics in a painting. Like, instead of centering everything perfectly on one of those lines or intersections, try offsetting your subject slightly for a bit more intrigue.
Adding Layers and Depth
A great portrait isn't just about the subject but also the background and any elements around it. Professionals use the composition technique to add layers and depth by playing with light and shadow. This involves using the intersections for not just the main subject but also secondary elements like props or parts of the background.
- Highlighting the subject with lighting can draw the eye naturally.
- Adding contrasting elements in the background can enhance depth.
Experimenting with Balance
Balance doesn’t mean symmetry. Experts will often add a subtle counter-balance to give the painting more life. This might mean adding a splash of color on the opposite side of your main subject to keep the viewer’s eye moving around the portrait.
Using Technology
Even the old-school folks are leaning into tech now. There are amazing digital tools and apps to mess around with the Rule of 3 grids directly on a device. They upload their preliminary sketches and play with placements until something clicks visually.
Fun Fact
Did you know that some hospital studies suggest viewing well-composed art can actually reduce stress by 60%? It's all about that balance and harmony that draws us in.