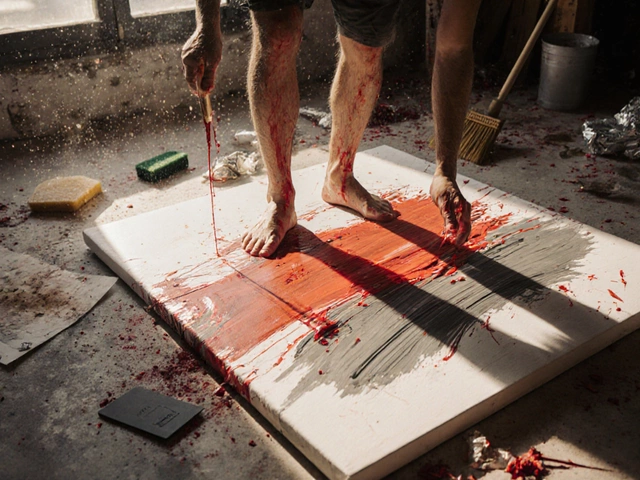
Beginner Sculpting: Simple Steps to Create Your First Piece
Ever stared at a lump of clay and wondered how to turn it into something real? You’re not alone. Sculpting feels like a big jump, but the basics are straight‑forward. Grab a few cheap supplies, follow a clear process, and you’ll have a small sculpture you can be proud of in just a few hours.
Pick the Right Material
For total beginners, air‑dry clay or polymer clay is the easiest. Both are cheap, don’t need a kiln, and harden by themselves. If you have a little more budget, a basic plaster or modeling wax works too, but the learning curve is higher. Start with a material that lets you fix mistakes—air‑dry clay is perfect because you can add water and smooth out bumps.
Gather Simple Tools
You don’t need a workshop full of fancy tools. A utility knife, a few metal shaping tools (or even old spoons), a sponge, and a wooden stick for details are enough. A rolling pin or a sturdy bottle works as a small roller to flatten clay. Keep a container of water close so you can smooth surfaces without cracking the material.
Next, set up a small workspace. A sturdy table, a plastic sheet to protect the surface, and good lighting are all you need. Keep the area tidy – a mess can make the learning process feel overwhelming.
Plan Your Design
Before you start molding, sketch a quick outline of what you want to make. It can be as simple as a basic animal shape or a stylized human head. Break the design into basic shapes: cylinders for limbs, spheres for heads, and flattened slabs for torso. This helps you see how the final piece will come together and keeps you from getting lost mid‑project.
For the first attempt, choose a simple subject like a basic vase, a small animal, or a rough human bust. Avoid intricate details until you get comfortable with the material.
Build an Armature (Optional)
If you’re working with larger pieces, a simple armature gives support. Twist a piece of wire into the rough shape of your sculpture and cover it with clay. The wire holds the weight and prevents sagging. For tiny projects, you can skip this step and just shape the clay directly.
Shape and Refine
Start adding clay in layers. Rough out the big shapes first, then gradually add finer details. Use your fingers to pinch and smooth, a wooden stick for carving lines, and a sponge to blend surfaces. Keep the clay moist – if it starts to dry, spray a little water or wrap it in a damp cloth.
When you’re happy with the form, smooth the surface with a soft brush or a damp sponge. This stage is where your piece starts to look polished.
Dry and Finish
Let the sculpture dry completely. Air‑dry clay usually takes 24‑48 hours depending on thickness. Once dry, you can sand rough spots with fine sandpaper. If you want color, acrylic paints work well on dried clay. A light coat of sealant will protect the paint and keep dust off.
That’s it – you’ve just created a beginner sculpture! The key is to keep the project small, use cheap, forgiving materials, and focus on basic shapes before chasing detail.
Feel free to explore other beginner guides on our site, like the step‑by‑step sculpting tutorial or the article on what makes a sculpture a sculpture. Each piece will give you a fresh angle on the process and help you grow faster.
Now grab some clay and start shaping. The first piece might be rough, but that’s how every artist begins.

Beginner Sculpture Ideas: What to Make First
Getting into sculpture can be exciting but also a little overwhelming when you’re not sure what to make first. This guide covers easy and practical ideas for beginner sculptures, whether you’re using clay, wood, or any other starter material. You’ll find facts about basic tools, tips for successful first projects, and reasons certain subjects work better when you’re just starting out. The focus is on stress-free learning and projects you’ll actually finish. Learn simple ways to build skills and confidence right out of the gate.
Continue ReadingCategories
Most popular
-

-
-
 Two Main Types of Landscape Paintings Explained Oct 18 2025
 -
 Who is the #1 artist on Spotify right now? Nov 18 2025
 -