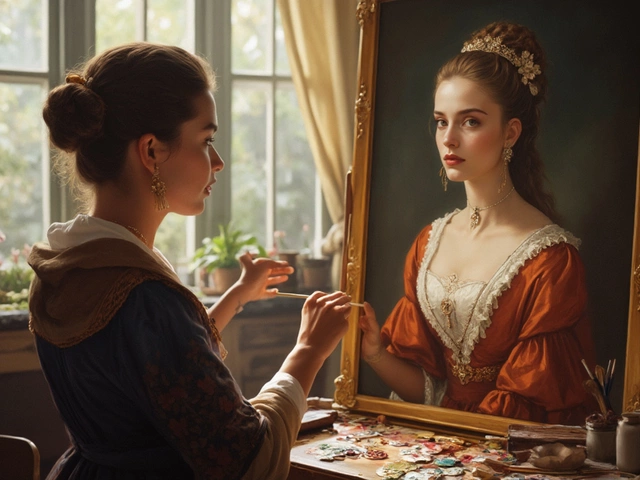
Ever wonder why every time you pick up a watercolor brush, your painting turns into a splotchy mess? You’re not alone. Even after years of dabbling, every little mistake in watercolor sticks out like Whiskers on a freshly mopped floor. Unlike acrylic or oil, you can’t just paint over your blunders with a thick new layer. Once that watery color soaks into the paper, it’s pretty much there to stay.
Here’s the really tricky part: watercolors look easy and even kind of foolproof when you scroll through online painting videos. But then you try, and suddenly the paint is going everywhere—pooling, streaking, mixing in weird ways you never asked it to. Trust me, I’ve had Eldon and Maris splash around at my art table and end up with ‘clouds’ that looked more like accidental coffee stains. Nobody tells you how much the water itself refuses to cooperate.
- What Makes Watercolor so Unforgiving?
- The Wild Nature of Water and Pigment
- Paper Problems: Why Nothing Looks Right
- How the Pros Control Chaos
- Realistic Progress: Tips for Getting Better
What Makes Watercolor so Unforgiving?
There’s no sugarcoating it—watercolor is tough because it doesn’t forgive mistakes. If you drop a blob of paint in the wrong spot, you can’t just wipe it up or cover it over like you can with acrylic. That stuff soaks into the paper instantly, and it dries fast. This super-thin paint is translucent, so if you layer more paint on top to fix something, it just turns muddy or dull.
One key challenge is that you have almost zero control once water and pigment hit the page. The paint stays wet for a short window, and in that time, it’s basically doing whatever gravity and surface tension want. Even if you use the best brushes, paper, and paints, you’ve still got to accept that some paintings just go sideways.
Check this out—according to most experienced artists, roughly 80% of finished watercolor paintings never see the light of day because they didn’t work out as planned. That’s a staggering failure rate, but it’s normal. Watercolor is a game of trial and error, not perfection.
| Why Watercolor is Unforgiving | What You Can’t Do |
|---|---|
| Paint stains instantly | Erase or paint over mistakes |
| Pigment stays transparent | Hide errors with thick layers |
| Paper can buckle and warp | Flatten the painting after it dries (unless you stretch the paper first) |
| Paint moves on its own | Control every blend and edge |
The big reason people get frustrated is that watercolor painting demands planning ahead. You have to save your lightest spots from the very start, because you can’t paint bright colors over dark areas. Every time you go back in and try to “fix” a spot, it starts looking overworked.
If you’re finding watercolor brutal, that’s normal. Even pros shred half their paintings before keeping a single favorite. Accepting the unpredictability (and even using it to your advantage) is the only way to make peace with this medium.
The Wild Nature of Water and Pigment
If you’re used to pencils or markers, watercolor paints are a straight-up shock. Water isn’t just a carrier, it’s basically the boss here. Water picks up the pigment and drags it everywhere. Instead of putting color exactly where you want, you’re sort of guessing and steering at the same time.
Different pigments react in different ways. Some granulate, which means they break up and leave a grainy texture. Others spread out evenly, making smooth washes. That unpredictability is why two colors on your mixing plate might look totally different once the brush hits the paper.
Control? Honestly, it comes down to chemistry. Water wants to move. Gravity pulls it down, while the fibers in most watercolor paper soak it up and spread it sideways. That’s why a tiny bit too much water turns your nice sketch into a puddle. Paint companies actually test how much their colors spread—there’s a reason professional artists know the "spread factor" of their favorite shades.
Here’s something wild: scientists have even measured the drying speed of watercolor washes. In a study at the University of Colorado, researchers found that a thin layer of watercolor dries in about 4-6 minutes in normal room humidity, but pigments with heavier loads of binder can stay wet much longer—sometimes 10 minutes or more. That open wet time is where most disasters happen. Even a little jostle or extra drop can send color blooming out where you don’t want it.
- Don’t trust how wet your brush looks—blot it on a paper towel before painting.
- Test colors on scrap paper first; some spread more than others.
- If you want hard edges, wait for the paper to dry. Want soft blends? Work wet-into-wet, but keep an eye out for sneaky drips.
My son Eldon once tried to fix a blue streak by adding “just a dab” of water. Suddenly there was a lake where a sky should be. It’s funny afterwards, but super frustrating in the moment. Getting used to watercolor is about learning to expect the unexpected. That’s honestly what makes watercolor painting hard—but it’s also what gives those jaw-dropping results when things go right.
| Water Control Factor | Impact on Painting |
|---|---|
| Pigment Granulation | Makes textures, can break up flat washes |
| Paint-to-Water Ratio | Controls intensity, spreading, and blending |
| Paper Absorbency | Speeds up or slows drying, impacts edge sharpness |

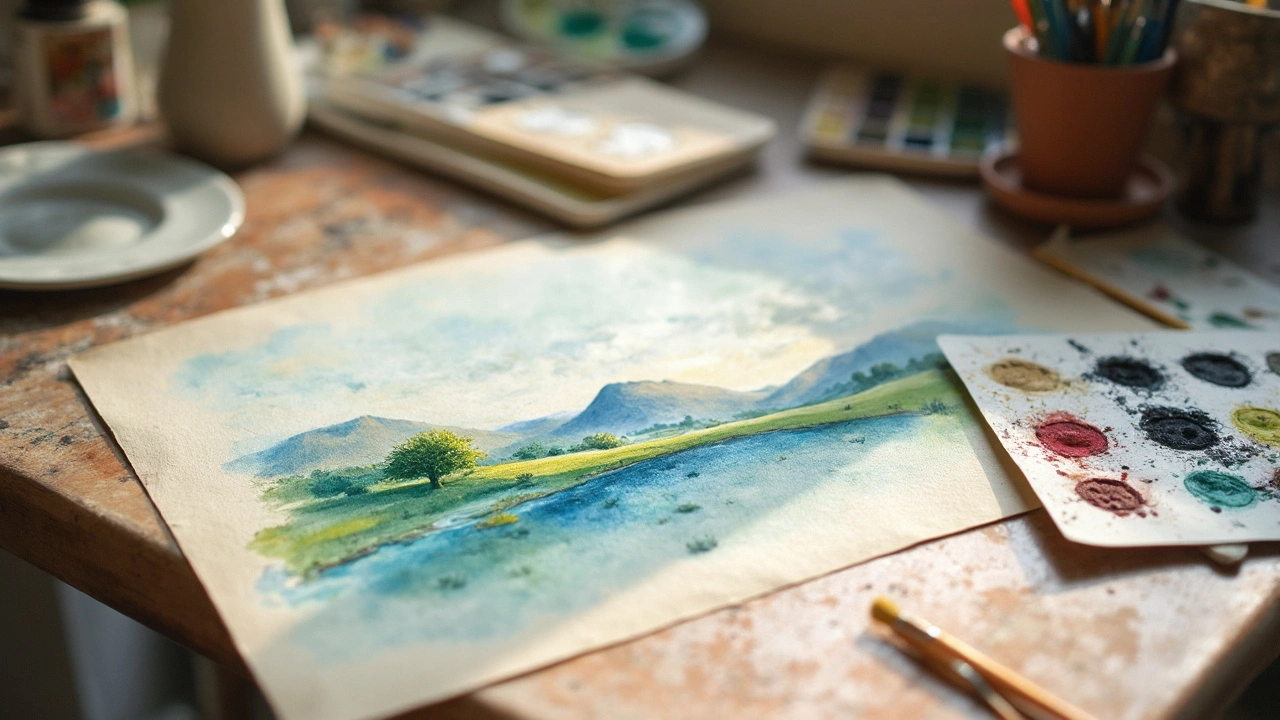
Paper Problems: Why Nothing Looks Right
Almost every beginner blames their lousy watercolor painting on a lack of talent, but the truth is usually hiding in the paper. Regular printer paper? Forget about it. It curls, tears, and makes your colors dull and patchy. Watercolor needs weight and a special texture to handle all that water and pigment.
Let’s break it down. Watercolor paper comes in different weights and surfaces—usually marked in pounds (like 140 lb) and types like cold-pressed or hot-pressed. Here’s what matters: heavier paper (140 lb or more) absorbs water without turning to mush, and cold-pressed paper gives you just enough texture for blending and soft edges. Too smooth (hot-pressed) and your colors might pool weirdly; too rough and your brush won’t glide.
Another nasty surprise? Cheap paper also shreds if you try to lift off paint or add layers. Want to know why your painting crumples after drying? That’s because thin paper can’t recover after getting soaked. Check this quick guide for a snapshot of common types:
| Type | Texture | Typical Weight | Best Use |
|---|---|---|---|
| Cold-Pressed | Medium | 140-300 lb | Most projects, easy blending |
| Hot-Pressed | Smooth | 140 lb | Detail work, sharp lines |
| Rough | Heavy texture | 200+ lb | Loose, dramatic effects |
Now here’s a practical checklist:
- Buy a pad marked for watercolor use (look for “acid-free” and at least 140 lb weight).
- Test how much water your paper can handle with a small wash before you jump into big projects.
- Stretch your paper (tape it down and wet it first) to prevent warping if you work super wet.
- Don’t be afraid to invest a little more in paper—it makes even cheap paint look better and easier to control.
If your colors aren’t popping or your painting falls apart with every stroke, it’s not you—it’s the paper. Sort that out first, and everything else gets way less frustrating.
How the Pros Control Chaos
Here’s the thing: professional watercolor artists deal with the same unpredictable paint and stubborn paper as the rest of us. They’re not born with superpowers—they just know a few tricks that make a huge difference. If you want to get a step closer to nailing watercolor painting, copy the habits built by experience, not magic.
First, pros almost always tilt their paper at an angle. This small change helps gravity do half the work. Water and color flow downward and blend more smoothly, instead of puddling where you don’t want it. My own setup is a stack of cookbooks—not fancy, but it saves me from crooked horizons every time.
They’re also careful with water. When you see a pro dipping their brush, they don’t dunk it and slop around. They test the brush on a scrap first. The goal is to keep just enough water for the look you want—washes shouldn’t drip off your paper, but you also don’t want a brush so dry it scrapes. This Goldilocks zone only comes with practice, and it’s totally normal to mess it up for a while.
When they mix colors, professionals pause before they paint. They check the mix on a test patch of paper to see if it matches what’s in their heads. There’s no guessing—no one wants green grass turning weirdly neon on their landscape. This extra step saves a lot of headaches, especially with unpredictable colors.
And here’s a pain-saving tip: the pros let layers dry before adding more paint. If you rush it, you risk ugly backruns and cauliflowers (yes, that’s actually what those splotchy explosions are called). It takes patience, but that break is a good time to grab a snack or pet your cat—trust me, the results are worth it.
Some artists even use hairdryers on a cool setting to speed up the drying without warping the paper. Just don’t get too close, or you’ll send your page flying.
- Angle your painting for smoother washes.
- Check your brush’s water with a paper scrap.
- Test your color mixes before using them for real.
- Let layers fully dry before painting more.
- Use a hairdryer carefully if you’re in a hurry.
Pros also work light to dark. You can add more pigment, but it’s hard to undo a dark patch. So start with pale washes, and build up slowly.
The takeaway? Controlling watercolor chaos isn’t about perfection. It’s about setting yourself up for fewer surprises, catching mistakes early, and getting comfortable with a little unpredictability. The more you play, the better you’ll get at steering the mess in your favor.
Realistic Progress: Tips for Getting Better
If you want to actually improve at watercolor painting, random doodling once in a while just isn’t going to cut it. Don’t worry, you don’t need to spend hours every day, but you do need to be smart about how you practice. Here’s what actually helps people get better, and what’s just noise.
- Practice with Purpose. Instead of making a full painting every time, focus on small exercises. Try making a swatch chart to see how different colors mix. Do a page of simple gradients or practice painting circles with clean edges. Repetition helps your hands learn how water and paint spread, and you’ll discover your mistakes faster.
- Use Good Paper. Crummy paper ruins even the best efforts. Get real watercolor paper—at least 140lb cotton—not those thin kids’ craft pads. The right surface lets you lift out mistakes and prevents puddles from buckling the page.
- Learn to Layer. Watercolor works great in layers, but only once the first layer is totally dry. Try painting a base color, let it dry (use a hair dryer if the kids are impatient like mine), and add the next layer on top. This lets you get richer colors and fix up shapes without turning everything muddy.
- Watch Your Water. The amount of water on your brush makes all the difference. Too much and everything drips together; too little and your paint looks scratchy. Always check your brush on a paper towel before touching the page. You’ll start noticing the perfect balance with practice.
- Be Okay with Mistakes. Not every painting will go as planned, even for pros. Keep the flops and write on the back what went wrong. Looking back after a few months, you’ll see real progress—and you might even laugh. My cat Whiskers ripped up one of mine, and honestly, she did me a favor.
I know it’s tempting to chase after fancy supplies, but time with brush-in-hand helps more than any expensive paint set. Stick with it. Celebrate tiny wins, even if it’s just a nice wash of blue. That’s how you build skills that actually last.