Sculpture for Beginners: Simple Steps to Start Shaping Anything
Ever watched a sculpture and thought, "I could try that"? You can. All you need is a clear plan, a few basic tools, and confidence that mistakes are part of the learning curve. This guide pulls together the best advice from our top beginner articles, so you can get hands‑on right away.
Getting Started with Materials
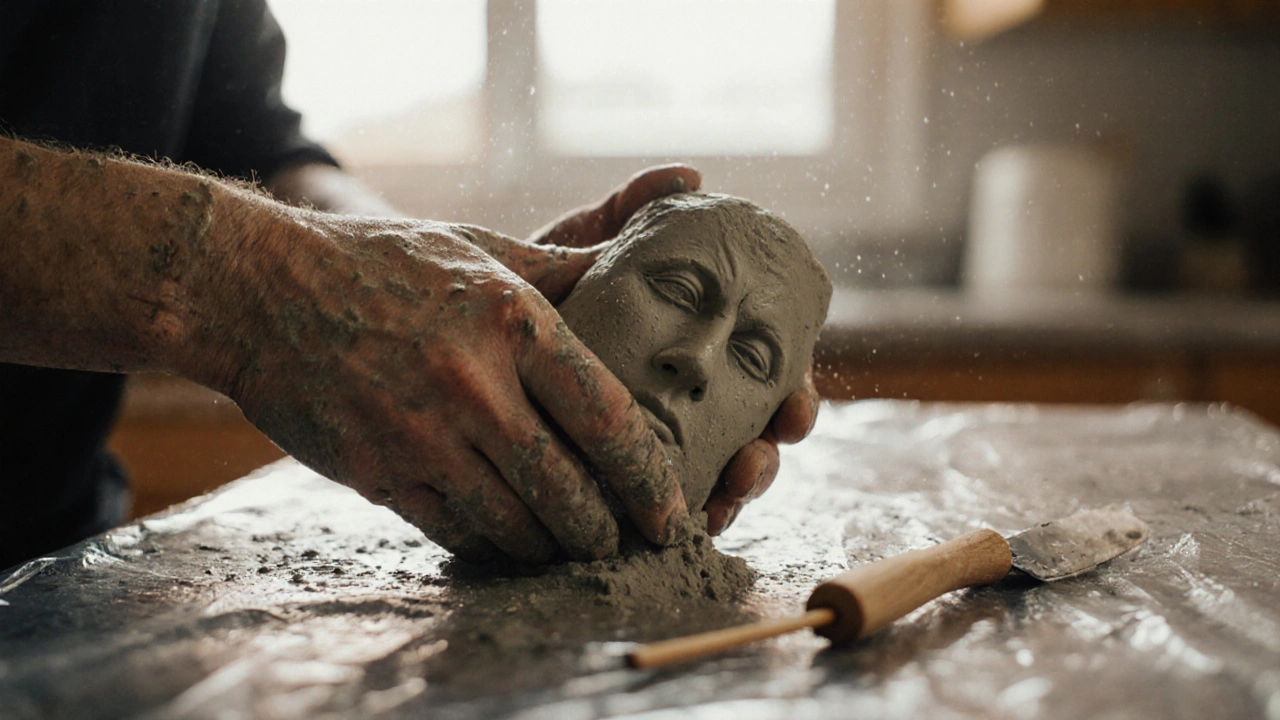
First thing: pick a material that feels forgiving. Clay is the go‑to for most newbies because it’s cheap, easy to shape, and lets you correct errors with water. If you prefer something sturdier, try air‑dry plaster or even papier‑mâché for quick projects. Don’t rush into expensive stone or bronze—those need special equipment and safety gear.
Next, gather the basics: a sturdy work surface, a set of carving tools (a simple wire loop tool, a wooden modeling tool, and a small knife work well), and a bucket of water if you’re using clay. A cheap rolling pin or a smooth bottle makes flattening clay a breeze. Keep a rag handy to wipe away excess water and keep the workspace tidy.
Basic Techniques to Try
Start with the “pinch pot” method. Roll a ball of clay, press your thumb into the center, and pull the walls up. This teaches you how the material behaves when you apply pressure. Move on to building up shapes by adding coils—roll the clay into long snakes and stack them, smoothing each layer as you go. This technique mirrors how many artists create larger forms without crushing the clay.
Another beginner‑friendly exercise is the “armature” approach. Use a simple wire coat hanger to form a rough skeleton of your piece, then cover it with clay. The armature gives support and lets you experiment with more complex poses without the weight of solid clay. Once the shape feels right, smooth the surface and let it dry.
Our article "How to Learn Sculpture Art: Step‑By‑Step Guide for Beginners" breaks each of these steps down with photos, while "Sculpture Art: How to Get Started Without Feeling Lost" shares tips on setting up a tiny studio at home. Both stress the importance of starting small—one simple vase or animal figure is enough to build confidence.
Remember, sculpture is about space as much as shape. Walk around your work as you build it. Notice how light hits different angles and how the form feels from each side. If something looks off, rotate the piece and adjust. This habit will help you spot problems early and develop a better eye for three‑dimensional balance.
Finally, don’t forget to let your first pieces dry slowly. Rapid drying can cause cracks, especially in thicker areas. If you’re using air‑dry clay, a gentle mist every few hours keeps it flexible. Once fully hardened, you can sand rough spots, paint, or seal with a clear coat for a finished look.
Ready to give it a try? Grab a lump of clay, a few tools, and start shaping something that’s yours. Every dent, crack, and perfect curve is a step toward becoming a confident sculptor. Check out the full beginner articles on our site for deeper dives, video demos, and community feedback. Happy sculpting!
Is Sculpting Difficult? What Really Matters When You Start
Sculpting isn't about talent-it's about showing up. Learn how to start with clay, avoid common mistakes, and build real skill without formal training or expensive tools.
Continue Reading
Beginner Sculpture Ideas: What to Make First
Getting into sculpture can be exciting but also a little overwhelming when you’re not sure what to make first. This guide covers easy and practical ideas for beginner sculptures, whether you’re using clay, wood, or any other starter material. You’ll find facts about basic tools, tips for successful first projects, and reasons certain subjects work better when you’re just starting out. The focus is on stress-free learning and projects you’ll actually finish. Learn simple ways to build skills and confidence right out of the gate.
Continue Reading