Landscape Orientation Advisor
Choose Your Scenario
Select factors that apply to your current shooting situation to get the optimal orientation recommendation.
Scene Width
Key Composition Lines
End Use
Technical Factor
Recommended Orientation
When you think about Landscape photography, the art of capturing natural scenery, you probably picture a wide, horizontal frame. But the short answer to the title’s question is: no, they don’t have to be horizontal.
Key Takeaways
- Both horizontal and vertical orientations can work for landscape images; the choice depends on subject, composition and final display.
- Horizontal (landscape) orientation excels for wide vistas, panoramic scenes, and screens that favor a 16:9 or 3:2 ratio.
- Vertical (portrait) orientation shines with tall elements like trees, cliffs, or layered foregrounds, and it fits portrait‑oriented prints and social‑media stories.
- Consider aspect ratio, rule of thirds, leading lines, and the intended viewing platform before committing to an orientation.
- A quick decision checklist can help you pick the right format while shooting, so you spend less time cropping later.
Understanding Orientation
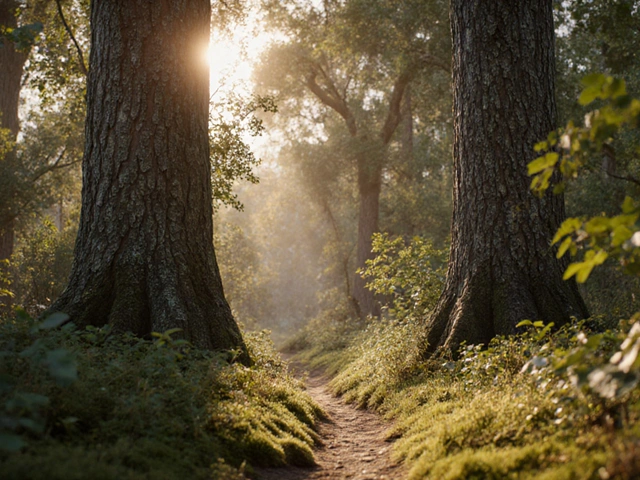
In photography, Horizontal orientation, often called "landscape" mode, has width greater than height. It matches what our eyes naturally scan in a wide landscape-mountains, horizons, city skylines. Vertical orientation, also known as "portrait" mode, has height greater than width. It’s ideal for subjects that grow upward or for compositions that benefit from a tall frame.
When Horizontal Works Best
Horizontal frames feel intuitive for traditional landscapes. Here’s why they often win:
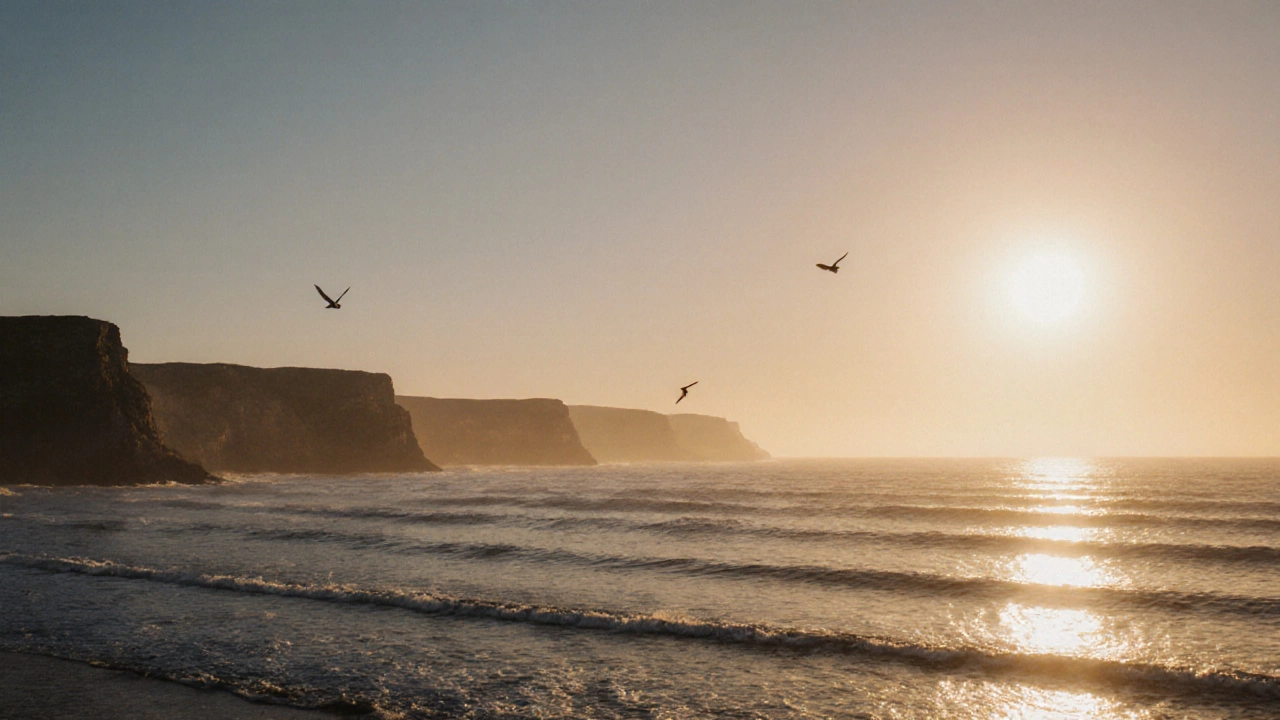
- Wide vistas: Expansive scenes like coastal stretches, mountain ranges, or desert dunes fill a horizontal canvas without feeling cramped.
- Panorama, a stitched‑together ultra‑wide image, inherently requires a horizontal layout. Even a single‑shot 16:9 image gives a sense of breadth.
- Aspect ratio, the proportional relationship between width and height, commonly 3:2 for DSLRs, aligns naturally with horizontal framing. This means you retain more native resolution when shooting in‑camera.
- Rule of thirds, a compositional grid that places key elements on intersecting lines, is often easier to apply to a wide scene where the horizon sits on the top or bottom third.
- Leading lines, roads, rivers, or fence rows that draw the eye across the frame, naturally extend left‑to‑right in horizontal shots.
- Printing on widescreen formats (e.g., 16×10, 20×13) or displaying on monitors and TV screens preserves the original composition without extra cropping.
When Vertical Can Be More Powerful
Vertical orientation isn’t just a fallback; it can make a landscape feel more intimate or dramatic.
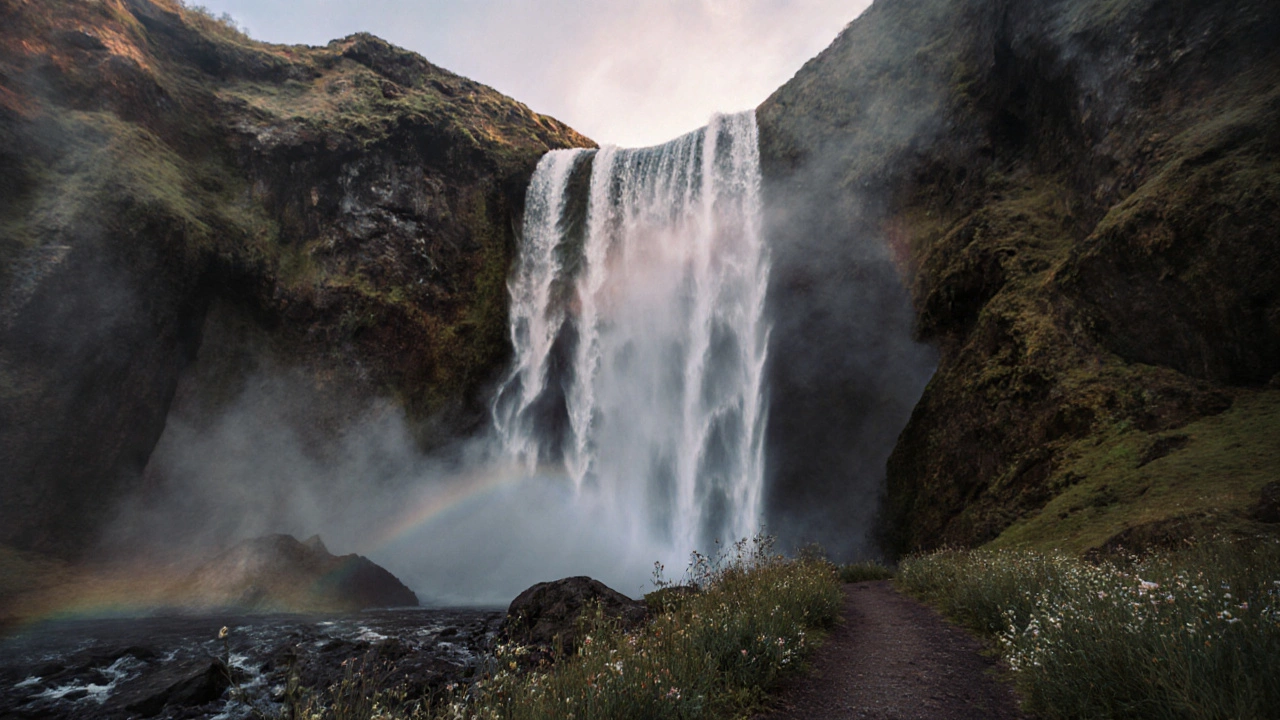
- Tall subjects: Trees, waterfalls, cliffs, or a lone lighthouse rise upward and benefit from a portrait frame that follows their line.
- Layered foregrounds: When the foreground contains strong elements-rocks, flowers, pathways-a vertical crop can emphasize depth, pulling the viewer’s eye from bottom to top.
- Social‑media platforms increasingly favour portrait‑oriented content: Instagram Stories, TikTok, and Snapchat use a 9:16 canvas. Shooting vertical saves you from drastic cropping later.
- Portrait prints (8×10, 11×14) are a classic choice for framing on walls; a vertical landscape can fill the space without awkward matting.
- Vertical frames can create a sense of upward movement, useful for conveying growth, aspiration, or even a sense of isolation in a vast sky.
Technical Considerations: Aspect Ratio, Resolution, and Cropping
Before you decide, think about the technical side:
- Sensor native ratios: Most DSLR and mirrorless cameras use 3:2 (full‑frame) or 4:3 (micro‑four‑thirds). Shooting in the native ratio preserves maximum pixels.
- If you want a vertical image from a 3:2 sensor, you’ll end up with a 2:3 crop-still high‑resolution, but you lose some width.
- For ultra‑wide horizontal shots, consider shooting in 16:9 or stitching multiple images. The trade‑off is a lower vertical resolution.
- When you plan to print large (e.g., 24×36), make sure the final pixel count meets the 300dpi guideline. Horizontal often gives you a larger pixel count across the width, but vertical can meet the same requirement if you start with a high‑resolution sensor.
- Modern camera apps often let you lock orientation before shooting, preventing accidental flips that force extra cropping in post‑production.

Quick Decision Checklist
| Consideration | Horizontal (Landscape) | Vertical (Portrait) |
|---|---|---|
| Scene width | Wide horizons, sweeping vistas | Limited width, tall elements dominate |
| Key composition lines | Leading lines run left‑to‑right | Lines run bottom‑to‑top |
| End use | Prints, widescreen displays, websites | Instagram Stories, portrait prints, mobile screens |
| Sensor ratio | Matches native 3:2 or 16:9 easily | Requires 2:3 or 4:5 crop |
| Emotional impact | Sense of openness, freedom | Sense of ascent, focus on vertical rise |
Practical Tips for Choosing Orientation on the Spot
- Scan the scene. Ask yourself: "Does the subject stretch more left‑right or up‑down?"
- Move a few steps left or right. If the frame feels empty on the sides, try vertical.
- Use the viewfinder grid. Align the horizon with the top or bottom third for horizontal; align a tall element with a side third for vertical.
- Consider the final platform. If you’ll share on TikTok, shoot portrait now; no need to re‑crop later.
- Take a quick test shot in both orientations if you have time. Compare histograms and composition on the go.
Remember, the goal isn’t to force a rule but to let the story dictate the shape. A well‑composed vertical landscape photos can be just as striking as a classic horizontal one.
Frequently Asked Questions
Can I convert a horizontal landscape to vertical without losing quality?
You can crop a horizontal image to a vertical aspect ratio, but you’ll lose pixels on the sides. If the original resolution is high (e.g., 6000×4000), you’ll still have enough detail for most prints. However, the composition may suffer if important elements were spread across the width.
Do any famous photographers prefer vertical landscapes?
Ansel Adams occasionally shot vertical panoramas to emphasize towering cliffs. More recently, contemporary photographer Michael Kenna uses tall frames to capture misty forests, letting the vertical line draw the eye upward.
Is there a rule about printing vertical landscapes?
Print shops usually offer standard portrait sizes (8×10, 11×14). Choose vertical orientation when you want the image to fill the height of the frame without much matting. Keep the image’s resolution at least 300dpi at the final print size for sharpness.
How does orientation affect social‑media engagement?
Platforms that favor vertical video (TikTok, Reels) reward portrait‑oriented content with higher visibility. For static images, Instagram’s grid displays square thumbnails, so a vertical image may be cropped, but the full‑screen view still benefits from the portrait shape.
Should I set my camera to a fixed aspect ratio?
If you know the final output (e.g., 3:2 prints or 9:16 Stories), setting the camera to that ratio saves you from cropping later. Otherwise, shoot in the sensor’s native ratio and decide in post‑production.