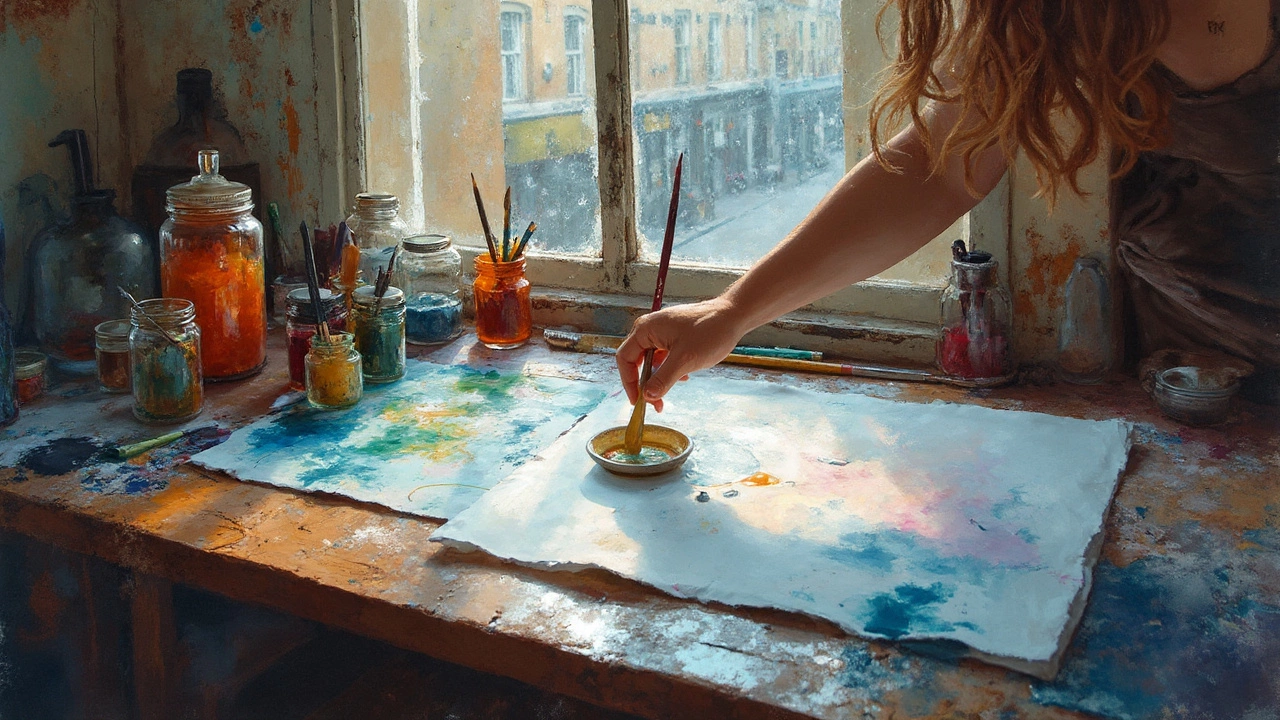
So, you're staring at your blank watercolor paper, brushes in hand, and you're wondering—should you really be soaking this stuff before you start splashing those colors around? It's not just about getting damp for the sake of it. There's some legit reasoning behind it.
Soaking watercolor paper can help keep it nice and flat while you're working on it. You know those annoying buckled and wavy bits that ruin your vibey skies? Yeah, those are often the result of not preparing the paper right. By soaking, you allow the fibers to expand evenly, preventing those dreaded wrinkles once it dries.
But wait, there's more! This little wet trick helps your brush glide smoothly, offering a more fluid blend of colors. Imagine painting without fighting stubborn dry spots or uneven surfaces. Sounds dreamy, right?
- Why Soak Watercolor Paper?
- Different Methods to Soak Paper
- When Not to Soak
- Impact on Painting Technique
- Common Mistakes and How to Avoid Them
- Alternatives to Soaking
Why Soak Watercolor Paper?
Soaking your watercolor paper isn't just some artsy ritual without a point. It actually serves a few very practical purposes. First off, when you soak the paper, those fibers get a chance to expand completely. Once they're stretched out, the paper is less likely to buckle and warp when you start sloshing water and paint on it. It's kind of like giving the paper a protective prep step.
Another reason to consider giving your paper a dip is how it affects absorbency. When paper isn't soaked, it can sometimes suck the life out of your colors, leaving them dull and washed out. A soaked sheet has more controlled absorption, so your colors stay as vibrant as you intended.
There's also an improvement in texture. Soaked paper offers a smoother surface, which makes it easier for your brush to glide over the paper like butter. This is especially a plus for beginners, as it helps in achieving more even washes without fighting against patches or rough spots.
And if you're into details, note this: professionals often soak their paper as an essential step in their process. It's all about that consistency and finish. Consider this: Would you want your works of art to look less than stellar because of a few buckles or uneven spots?
Ultimately, soaking is about ensuring a more predictable and enjoyable painting experience. It means fewer surprises and more control over how your artwork turns out. Taking that little extra time at the start can save you a whole lot of frustration down the line.
Different Methods to Soak Paper
Alright, let's chat about how you can actually get your watercolor paper ready for some creative magic. Soaking your watercolor paper isn't a one-size-fits-all deal; there are different ways to do it depending on what you prefer and what you’ve got lying around.
First up—the basic dip method. It's as straightforward as it sounds. Fill up a clean tub or a sink with cold water and slide your paper in there, fully submerging it for about 5 to 10 minutes. Why cold water? Well, using hot water can weaken the paper fibers, and nobody wants that. Once your paper has had its luxurious bath, gently lift it out and let the excess water drip off.
If the dunk-and-soak isn’t quite your vibe, you could try the spray method. Grab a clean spray bottle, fill it with water, and spray a fine mist evenly across both sides of the paper. This method is perfect if you’re in a small space or don’t want to face the hassle of finding a big enough basin.
Now, say you're the sort who loves precision. You can also use a sponge. Just dampen the sponge with clean water and gently wipe it over both sides of the paper. This technique lets you control exactly how much water you’re using, which can be super helpful if you're new to this.
If you're thinking, 'Do I really need to soak all types of watercolor paper?', consider this: heavier-grade paper (anything over 300 gsm) can hold its own without soaking but still benefits from a little prep work so it doesn’t buckle as much.
Here’s a quick comparison of these methods for easy reference:
| Method | Best For | Duration |
|---|---|---|
| Dip Method | Full saturation, large papers | 5-10 minutes |
| Spray Method | Controlled environment, small sheets | Until evenly damp |
| Sponge Method | Precision, less water use | Until evenly damp |
Whichever method you choose, make sure to gently stretch the paper flat on a board and tape down the edges when you're done. A bit of security so your masterpiece doesn’t turn into a warp-fest while it dries. Try these methods and see which one gels with your style!
When Not to Soak
It might seem like soaking your watercolor paper is the way to go every single time, but that’s not always true. There are moments when skipping the soak is actually the smarter move.
First off, if you’re working with really excellent quality, heavy watercolor paper, typically around 300 lb (640 gsm), it’s been engineered to handle moisture without distorting. So, you could just dive in dry and save yourself some time. These bad boys are designed to lay flat even when painted heavily.
Then there’s the factor of timing. If you’re on a tight schedule—like trying to finish a last-minute project or beating a deadline—soaking might not be practical. Getting paper all wet means you've got drying time to look forward to. And trust me, waiting with wet paper isn't the best use of your precious painting hours.
You might also want to avoid soaking if you’re aiming for a specific texture or effect only achievable with a dry technique. Some artists love granulating pigments and rough textures that come from applying watercolor directly onto dry paper.
And remember this: If your goal is to create very detailed work, soaking might cause too much softening, making fine lines and intricate details a headache to achieve.
In a nutshell, while soaking your watercolor paper can help in many scenarios, there are totally valid times to go without it. Keep these situations in mind, and choose what aligns best with your creative vision and practical needs.
Impact on Painting Technique
Alright, let’s get real about how soaking your watercolor paper can switch up your painting game. If you've ever wondered why your colors sometimes look off or why your lines don't flow as you'd hoped, the answer might lie in how you treat your paper before painting.
First off, soaking helps with the absorption of water. This means when you’re blending colors, your paper isn’t sucking up all the moisture immediately, giving you more time to work your magic before everything dries up. Ever tried wet-on-wet technique? Soaking your paper first might just give you that dreamy effect you’re after.
Also, with soaked paper, those harsh edges you sometimes get when layers dry too quickly sort of melt away. You end up with smoother transitions and blends, making your color gradients look professional. Who doesn’t like a nice, seamless fade?
Here’s a tip: not all paintings benefit from soaking the paper. It mostly shines when you’re tackling large washes, trying out that wet-on-wet approach, or working on projects where you need to rework sections without the fear of damaging the surface.
And let’s not forget the technical bit. Soaked paper can make it easier to achieve those tricky effects like glazing and layering. If you've struggled with paint lifting off when applying new layers, a properly soaked sheet can help minimize this frustration.
By integrating this practice, you might also notice an improvement in color richness. The uniform surface allows pigments to sit atop the fibers rather than being slurped in unevenly. So, if you’re aiming for vibrant hues, this might be your secret weapon.
Common Mistakes and How to Avoid Them
Diving into the world of watercolors can be a bit tricky, and soaking watercolor paper is no exception. Let's tackle some classic blunders and learn how you can steer clear of them.
One common mistake is over-soaking. If you drench the paper too much, it can get flimsy and prone to ripping. So, how do you avoid turning your room into a soggy mess? Instead of soaking it for too long, aim for a brief submersion. Generally, two to five minutes is plenty.
On the flip side, some folks under-soak, barely letting the paper get acquainted with water. The result? You still end up battling with those pesky ripples while painting. It's all about finding that sweet balance.
Apart from timing, watch out for uneven soaking. If you only dunk part of the sheet, it will buckle unevenly. Make sure to immerse the entire paper evenly. Alternatively, use a clean sponge to apply water across the surface gently.
Failing to stretch after soaking is another slip-up. It might seem like a hassle, but stretching helps the paper dry flat. Stretching can be as simple as taping the edges firmly on a board. Think of it as the equivalent of ironing your favorite shirt – it just looks better.
Here's a golden nugget: Not using the right tape can lead to frustrations. If your tape isn’t strong enough, the edges will lift, messing with your stretch. Masking tape might give way; instead, grab some gummed tape for a solid hold.
“Proper preparation—like soaking and stretching—can significantly improve your final artwork's appearance,” notes watercolorist Angela Fehr.
And hey, not all paper is the same. For lighter weight paper, say under 200lb, be extra cautious. It needs more attention during the stretch due to its thinner build.
| Paper Weight | Soaking Time | Stretching Requirement |
|---|---|---|
| 90 lb | 2-3 minutes | High |
| 140 lb | 3-5 minutes | Medium |
| 300 lb | No soaking needed | Low |
By knowing these pitfalls and how to navigate them, you're setting yourself up for smoother, ripple-free masterpieces. Go create, without the wrinkles!
Alternatives to Soaking
Alright, so maybe soaking your watercolor paper isn't your jam, or you're out of time to play around with water baths. What else can you do to get that smooth, wrinkle-free finish? Don't worry; there are a few nifty tricks up your sleeve.
One popular alternative is using a spray bottle. Just give your paper a light mist before you start with your paintjob. This helps dampen the paper evenly without the full-blown soak. It keeps things quick and easy, but be careful not to drench it, or you'll end up with soggy chaos.
You can also try the gum tape method. It's an old-school technique where you stretch your paper onto a board and tape the edges with water-activated gum tape. As the paper dries, it shrinks and tightens up, preventing those annoying buckles from taking over your masterpiece.
If you have a love-hate relationship with tape, another cool option is to use a watercolor block. These are pads where the edges are glued together. You just paint on the top sheet and cut it free afterward, which keeps things from getting too wavy in the first place.
Last but not least, when it comes to alternatives, consider using a heavier-weight watercolor paper. Heavier sheets, like 300lb, don't buckle as much, even without soaking or taping. They can handle more water without complaint, but just a heads up, they can be pricier.
Playing around with these methods can help you find what works best for your style and setup. It’s all about making life a bit easier while chasing the perfect painting moment.